It's possible to use Notepad++ to make your code for Manim animation but I recommend you use PyCham as a code editor.
The advantages of PyCham comapred to notepad++ are,
- Excellent automatic-code-completion (automatically recommends the remaining charactes when typing only a part of variable or method name)
- Go to the definition functionality by 'Ctrl-B' short-key
When you want to use a function or method, you often need to see how the function is defined. In PyCham, it's very convinent to move to the definition of it by just pressing Ctrl-B key on the name of the function. - Possilble to debug your code with break-point and watch the value of variable at that time
Visual Studio ro Visual Code editior also supports above functionalities, but it's difficult to use '-m' option for execution Manim code and the 'comment mark' functionality is difficult in the Visual Studion rather than PyCham.
Install PyCham
I won't explain how to install PyCham in here but only focus on the setting for Manim after installation. For the installation, please refer to 'PyCham Installation Guide' page and install PyCham in you PC.
After installing PyCham, please follow the steps below.
Create a project in the PyCham
Let's assume we already made 'C:/now/manim' directory and finished to locates all required files for Manim coding, and we'll use 'C:/now/manim' directory as the main directory for PyCham project.
If you didn't make 'C:/now/manim' directory yet, please make it according to the guide of this page.
1. Run the PyCham program and select 'Create New Project'

2. Select 'C:/now/manim' directory for 'Location' of the New Project
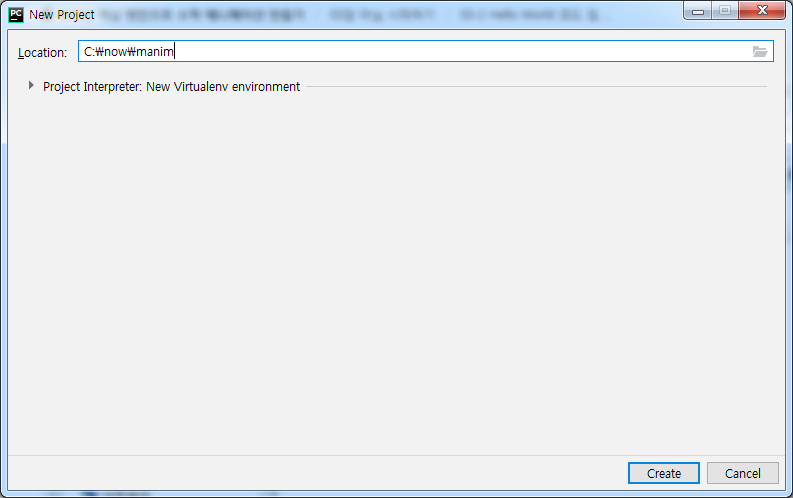
3. Select proper 'Python Interpreter' for the project
If there are multiple python.exe interpreters on your PC, you need to notify PyCham the Python interpreter that has you want to use that has the necessary libraries and packges installed for the Manim coding.
In my case, 'C:/dev/python3.7' is my default interpreter and the necessary libraries (pycairo, etc) are installed here, so I specified it as below in the PyCham.
If you have only one Python.exe in your PC, there is no need to do this step.

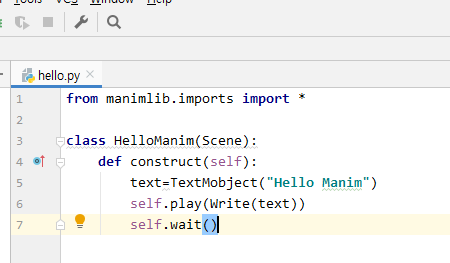
4. Create 'C:/now/manim/src/hello.py' file


5. Copy & Paste below code to 'hello.py' editing window.
from manimlib.imports import *

class HelloManim(Scene):
    def construct(self):
        text=TextMobject("Hello Manim")
        self.play(Write(text))
        self.wait()
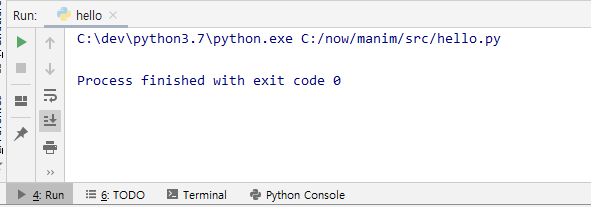
6. Run 'hello.py'
Press 'Ctrl-Shift-F10' key or choose 'Run hello' in the menu of right-mouse click for the hello.py file.

Although the following message appears in the execution window at the bottom of the PyCham, the video will not be created yet. We have to modify running configuration to suit the Manim.
'Ctrl-Shift-F10' is a short-key to run selected code file. This will make a default Configuration to run the file automatically. However, Manim need different running parameter compate to the standard Python file, we need to modify the Configuration suit for Manim.
It's convinent to make standard running Configuration at first and modify it better than to create running Configuration manually.
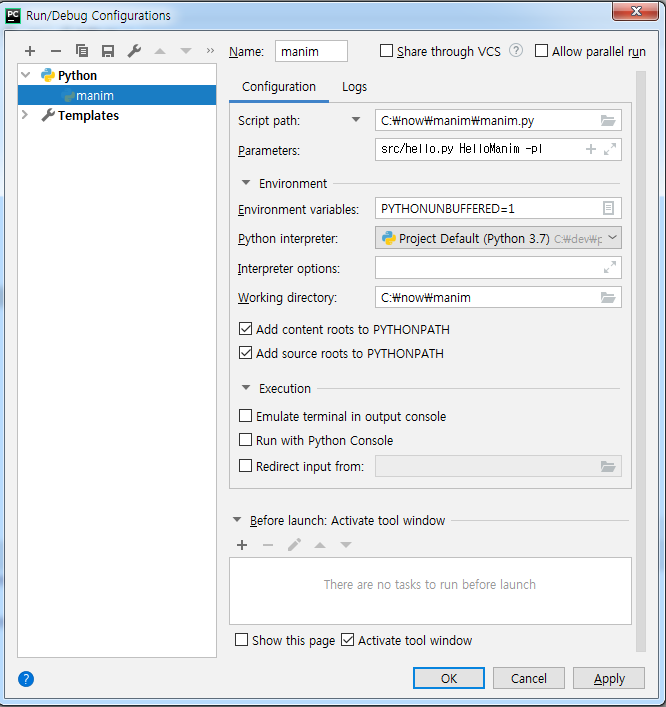
7. Modify 'Configuration'
Select 'Run > Edit Configurations' in the PyCham menu.

Modify some values like below.
- Script path: C:/now/manim/manim.py
- Parameters:  src/hello.py HelloManim -pl
- Working directory: 'C:\now\manim'
We have to type as below if we're running the code in the Command Prompt window.
C:/now/manim>python -m manim src/hello.py -pl
The setting for the Configuration is same effect to this command.
There is another way to make Configuration for Manim such as set 'Script path: C:/now/manim/src/hello.py' and set 'Interpreter options: -m manim'.
However, this does not allow debugging.
Therefore, it's better to use above setting as 'Script path: C:/now/manim/manim.py'
8. Create viedo file with the Run command by pressing 'Shift-F10'
If you press 'Shift-F10' key, the Configuration script will be executed and it will create a video file as 'C:/now/manim/media/vidoos/hello/480p15/HelloManim.mp4'


After making and modifying the running Configuration, you only need to press 'Shift-F10' key to run the code.
'-pl' option means that 'Preview, Low quality resolution'
That is, the video will be generated with low quality resolution (480 pixels with 15 frame per second) and will be played automatically after createion.
You can find a description of the launch options for Manim in here.
Next: [03-3] Explain about "Hello Manim" code
[03-3] Explain about "Hello Manim" code
In this page, I will explain about 'Hello Manim' code which is used in the previous page. from manimlib.imports import * class HelloManim(Scene): def construct(self): text=TextMobject("Hello Manim")..
infograph.tistory.com
Go To: [99] Table of Contents
'Programming > Manim Lectures' 카테고리의 다른 글
| [03-4] Watch samples (PyCham) (1) | 2020.05.31 |
|---|---|
| [03-3] Explain about "Hello Manim" code (0) | 2020.05.31 |
| [03-1] Create "Hello Manim" (notepad++) (0) | 2020.05.31 |
| [03]Hello Manim (0) | 2020.05.31 |
| [02-4]Multilingual setting in LaText (0) | 2020.05.31 |


